Bootstrap Tooltip Content
Intro
In some instances, most especially on the desktop it is a smart idea to have a subtle callout together with a couple of hints appearing when the site visitor positions the computer mouse arrow over an element. In this way we ensure the right info has been certainly presented at the correct time and ideally enhanced the site visitor experience and comfort while applying our pages. This behaviour is managed with tooltip element which in turn has a constant and great to the whole entire framework design appearance in the current Bootstrap 4 version and it's definitely easy to put in and set up them-- why don't we check out just how this gets done .
Activities to learn when employing the Bootstrap Tooltip Class:
- Bootstrap Tooltips depend on the 3rd party library Tether for arranging . You have to feature tether.min.js just before bootstrap.js in order for tooltips to work !
- Tooltips are actually opt-in for effectiveness reasons, in this way you must activate them by yourself.
- Bootstrap Tooltip Function with zero-length titles are never featured.
- Specify container: 'body' to stay away from rendering complications in extra complicated
components ( just like input groups, button groups, etc).
- Triggering tooltips on hidden elements will certainly not operate.
- Tooltips for .disabled or else disabled features have to be set off on a wrapper element.
- When caused from hyperlinks which span several lines, tooltips will be focused. Utilize white-space: nowrap; on your <a>-s to prevent this activity.
Got all of that? Great, why don't we see precisely how they work with some instances.
How to put into action the Bootstrap Tooltips:
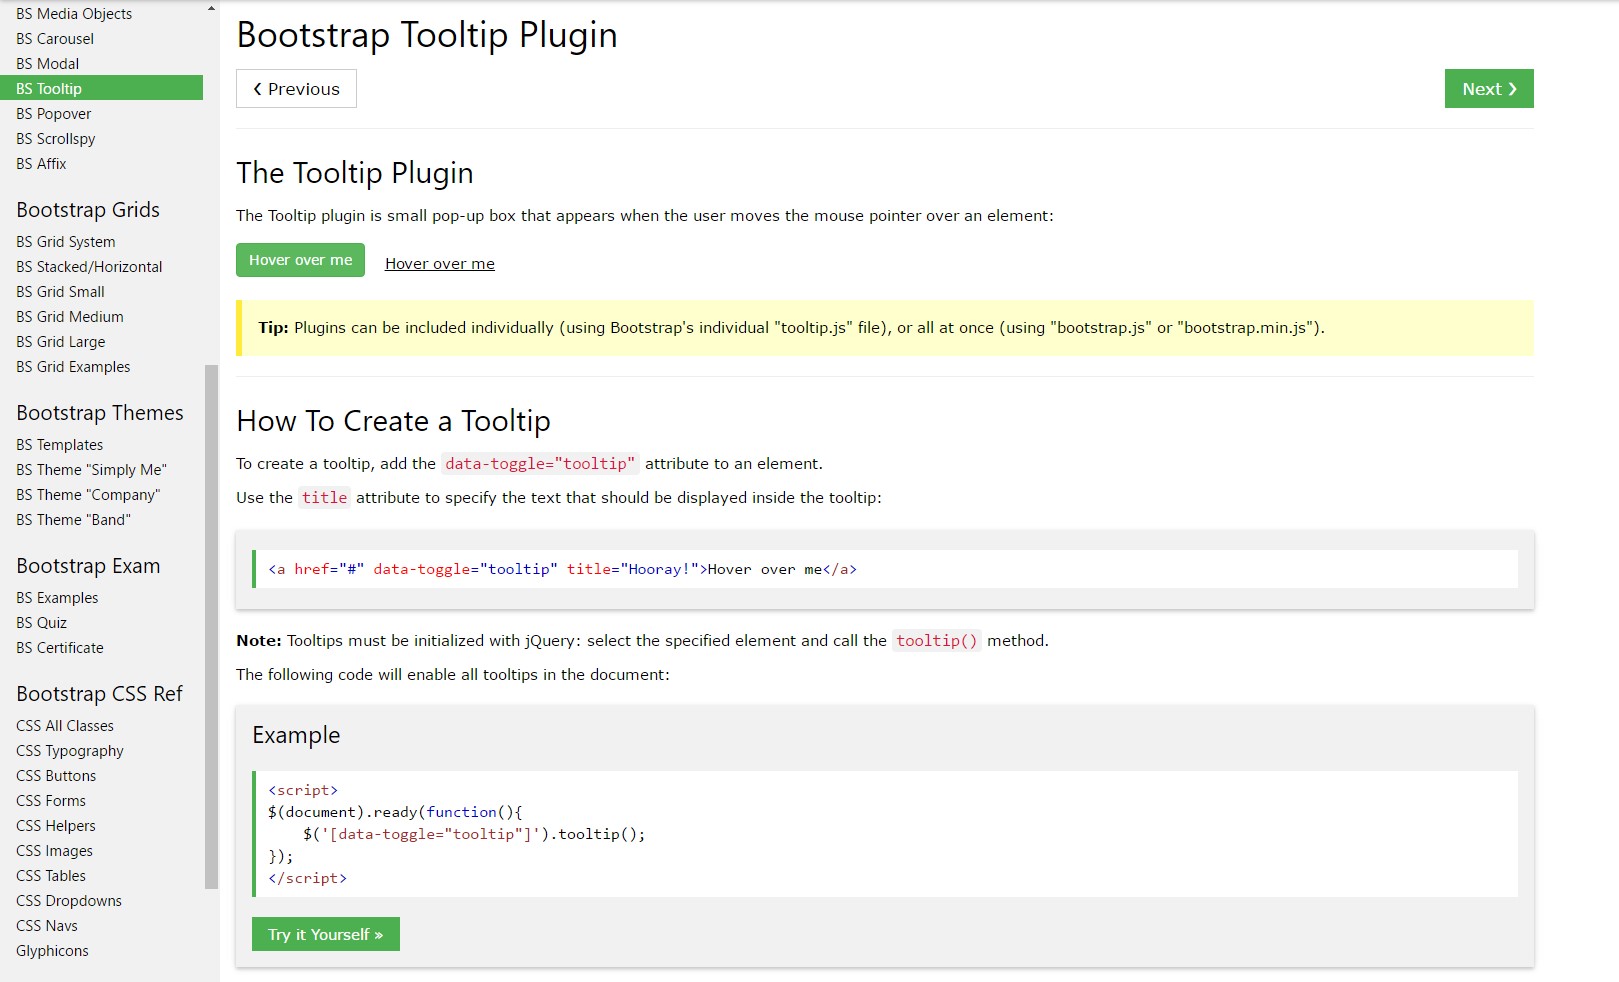
To begin to get use of the tooltips features we need to allow it considering that in Bootstrap these particular components are not permitted by default and require an initialization. To do this provide a simple <script> feature somewhere at the end of the <body> tag ensuring it has been placed after the the call to JQuery library given that it applies it for the tooltip initialization. The <script> component needs to be wrapped around this initialization line of code $(function () $('[data-toggle="tooltip"]').tooltip()) which in turn will activate the tooltips functionality.
Things that the tooltips actually carry out is receiving what's inside an component's title = ”” attribute and displaying it in a stylizes pop-up feature. Tooltips can possibly be used for a variety of elements but are usually very most appropriate for <a> and <button> elements given that these particular are actually used for the site visitor's communication with the webpage and are far more likely to be needing certain clarifications relating to what they actually perform if hovered with the computer mouse-- right before the eventual selecting them.
Once you have turned on the tooltips capability just to assign a tooltip to an element you require to incorporate two required and just one extra attributes to it. A "tool-tipped" elements should have title = “Some text here to get displayed in the tooltip” and data-toggle = “tooltip” attributes-- these are actually pretty sufficient for the tooltip to work out emerging over the chosen component. In the case that nonetheless you intend to specify the positioning of the hint text relating to the component it concerns-- you can certainly additionally do that in the Bootstrap 4 framework with the alternative data-placement =” ~ possible values are – top, bottom, left, right ~ “ attribute which values like rather clear. The data-placement default value is top and in the case that this attribute is simply omitted the tooltips show up over the defined component.
The tooltips appearance and behaviour has stayed pretty much the same in each the Bootstrap 3 and 4 versions given that these actually perform function pretty properly-- nothing much more to be demanded from them.
Situations
One solution to initialize all tooltips on a page would be to choose them by their data-toggle attribute:
$(function ()
  $('[data-toggle="tooltip"]').tooltip()
)
Stationary Demo
4 options are provided: top, right, bottom, and left aligned.

Interactive
Hover above the switches below to view their tooltips.

<button type="button" class="btn btn-secondary" data-toggle="tooltip" data-placement="top" title="Tooltip on top">
  Tooltip on top
</button>
<button type="button" class="btn btn-secondary" data-toggle="tooltip" data-placement="right" title="Tooltip on right">
  Tooltip on right
</button>
<button type="button" class="btn btn-secondary" data-toggle="tooltip" data-placement="bottom" title="Tooltip on bottom">
  Tooltip on bottom
</button>
<button type="button" class="btn btn-secondary" data-toggle="tooltip" data-placement="left" title="Tooltip on left">
  Tooltip on left
</button>
And also with customized HTML provided:
<button type="button" class="btn btn-secondary" data-toggle="tooltip" data-html="true" title="<em>Tooltip</em> <u>with</u> <b>HTML</b>">
  Tooltip with HTML
</button>
Application
The tooltip plugin generates material and markup on demand, and by default places tooltips after their trigger element.
Produce the tooltip via JavaScript:
$('#example').tooltip(options)Markup
The demanded markup for a tooltip is simply just a data attribute and title on the HTML component you want to have a tooltip. The generated markup of a tooltip is quite easy, though it does demand a placement (by default, set up to top by means of the plugin).
Having tooltips work with key-board plus assistive technology users.
You should just bring in tooltips to HTML components that are definitely interactive and usually keyboard-focusable ( like urls or form controls). Despite the fact that arbitrary HTML components ( just like <span>-s) can be developed focusable via providing the tabindex="0" attribute, this will certainly bring in difficult to understand and most likely annoying tab stops on non-interactive elements for keyboard site visitors. In addition, the majority of assistive technologies currently do not really declare the tooltip within this circumstance.
<!-- HTML to write -->
<a href="#" data-toggle="tooltip" title="Some tooltip text!">Hover over me</a>
<!-- Generated markup by the plugin -->
<div class="tooltip tooltip-top" role="tooltip">
<div class="tooltip-arrow"></div>
<div class="tooltip-inner">
Some tooltip text!
</div>
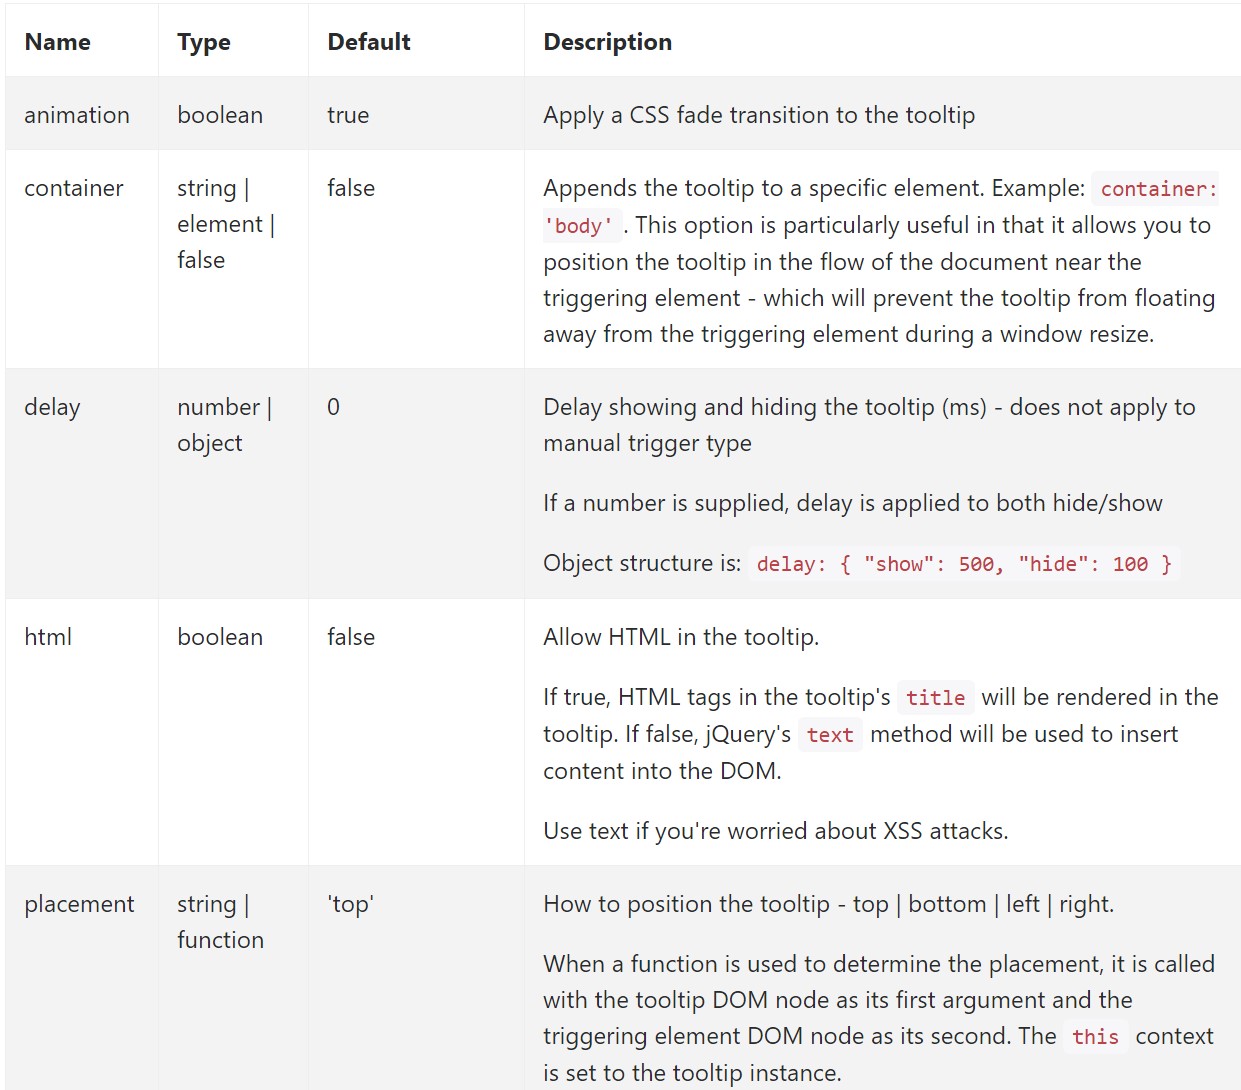
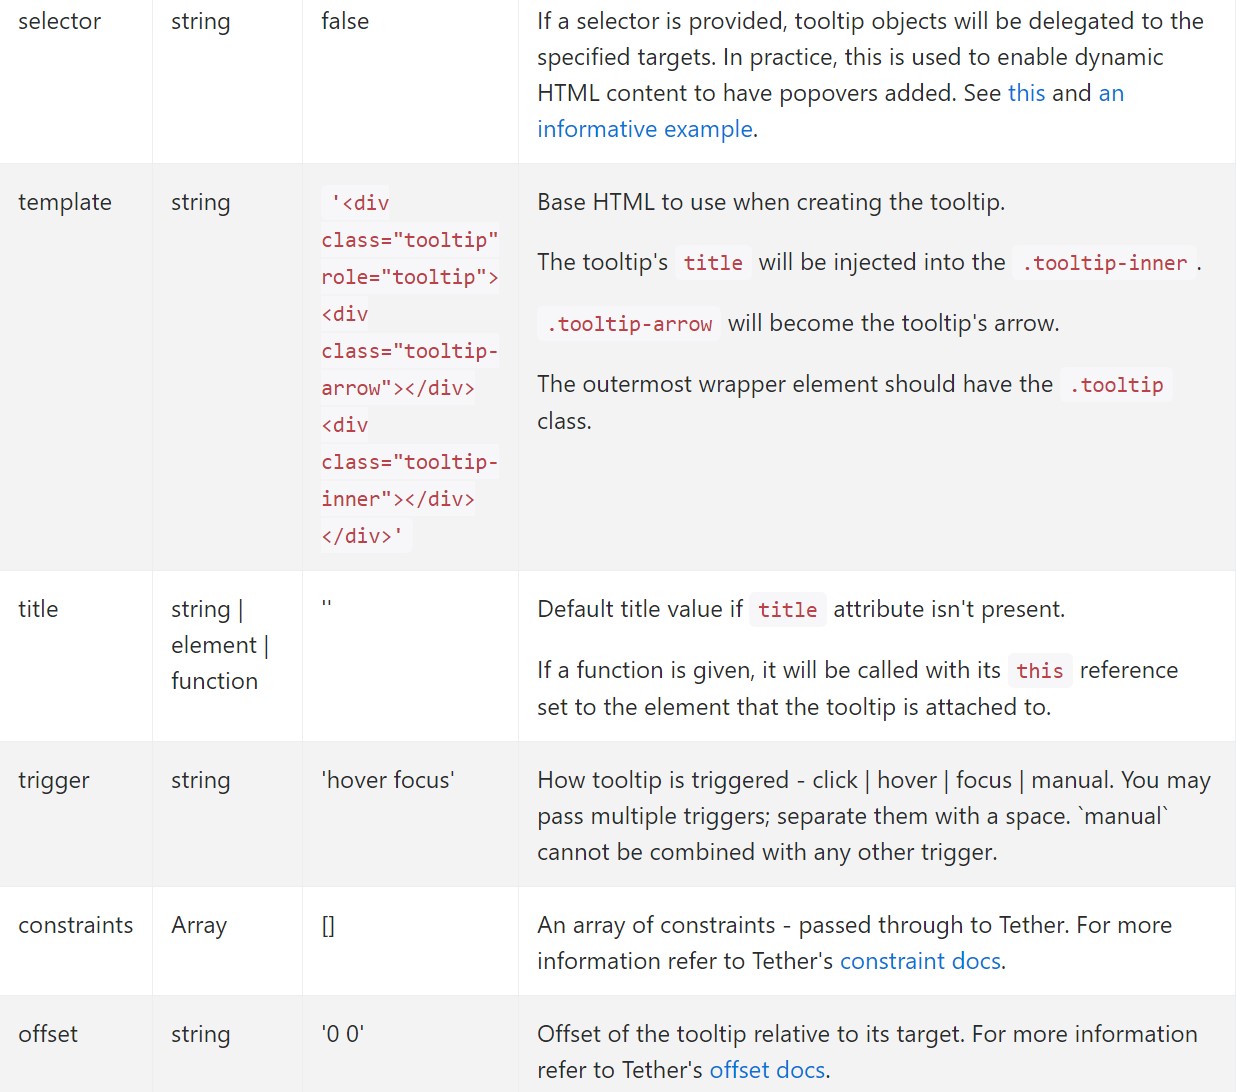
</div>Possibilities
Options can possibly be passed by means of data attributes as well as JavaScript. For data attributes, append the option name to data-, just as in data-animation="".
Data attributes for individual tooltips
Alternatives for particular tooltips have the ability to additionally be defined with using data attributes, like explained aforementioned.
Methods
$().tooltip(options)
Adds a tooltip handler to an element variety.
.tooltip('show')
Displays an element's tooltip. Comes back to the customer right before the tooltip has really been shown ( such as right before the shown.bs.tooltip event happens). This is taken into account a "manual" triggering of the tooltip. Tooltips with zero-length titles are never exhibited.
$('#element').tooltip('show').tooltip('hide')
Covers an element's tooltip. Goes back to the customer right before the tooltip has in fact been covered ( such as prior to the hidden.bs.tooltip activity happens). This is kept in mind a "manual" triggering of the tooltip.
$('#element').tooltip('hide').tooltip('toggle')
Toggles an element's tooltip. Comes back to the customer just before the tooltip has actually been displayed or else covered ( such as right before the shown.bs.tooltip or hidden.bs.tooltip activity happens). This is kept in mind a "manual" triggering of the tooltip.
$('#element').tooltip('toggle').tooltip('dispose')
Hides and removes an element's tooltip. Tooltips which employ delegation (which are created working with the selector possibility) can not actually be separately destroyed on descendant trigger features.
$('#element').tooltip('dispose')Events
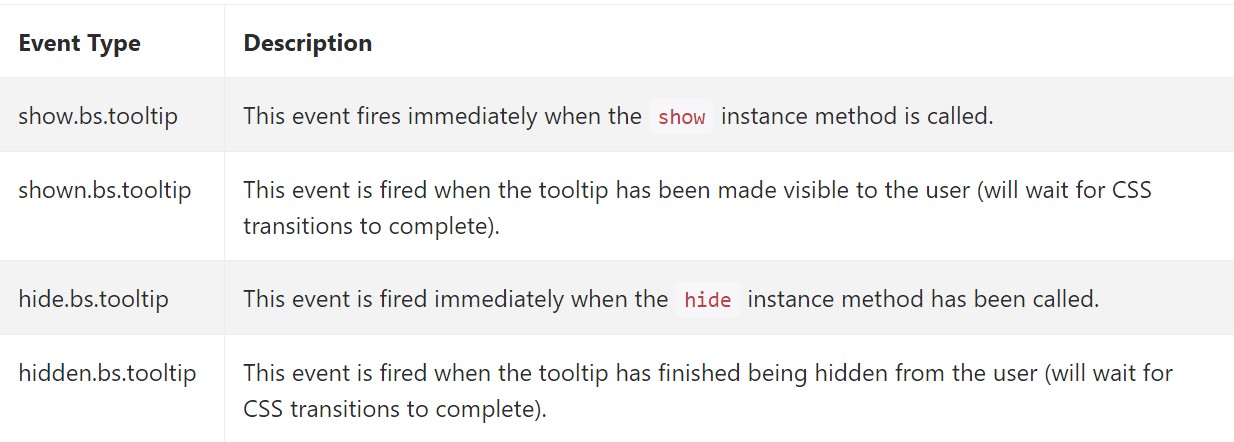
$('#myTooltip').on('hidden.bs.tooltip', function ()
  // do something…
)
Final thoughts
A thing to think about here is the quantity of info that arrives to be put in the # attribute and eventually-- the placement of the tooltip baseding on the placement of the major feature on a screen. The tooltips need to be precisely this-- small important ideas-- setting excessive information might even confuse the site visitor rather than assist getting around.
In addition if the primary feature is too near to an edge of the viewport placing the tooltip at the side of this very border might possibly lead to the pop-up text message to flow out of the viewport and the info inside it to end up being practically unusable. And so when it involves tooltips the balance in working with them is important.
Take a look at a few on-line video tutorials relating to Bootstrap Tooltips:
Connected topics:
Bootstrap Tooltips approved records
Bootstrap Tooltips information
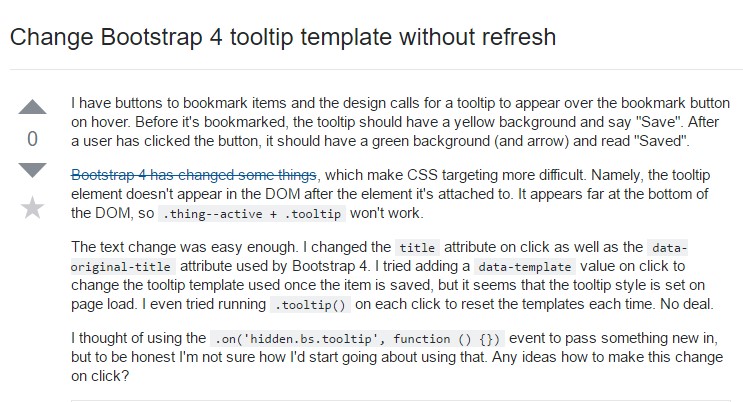
Change Bootstrap 4 Tooltip template without refresh